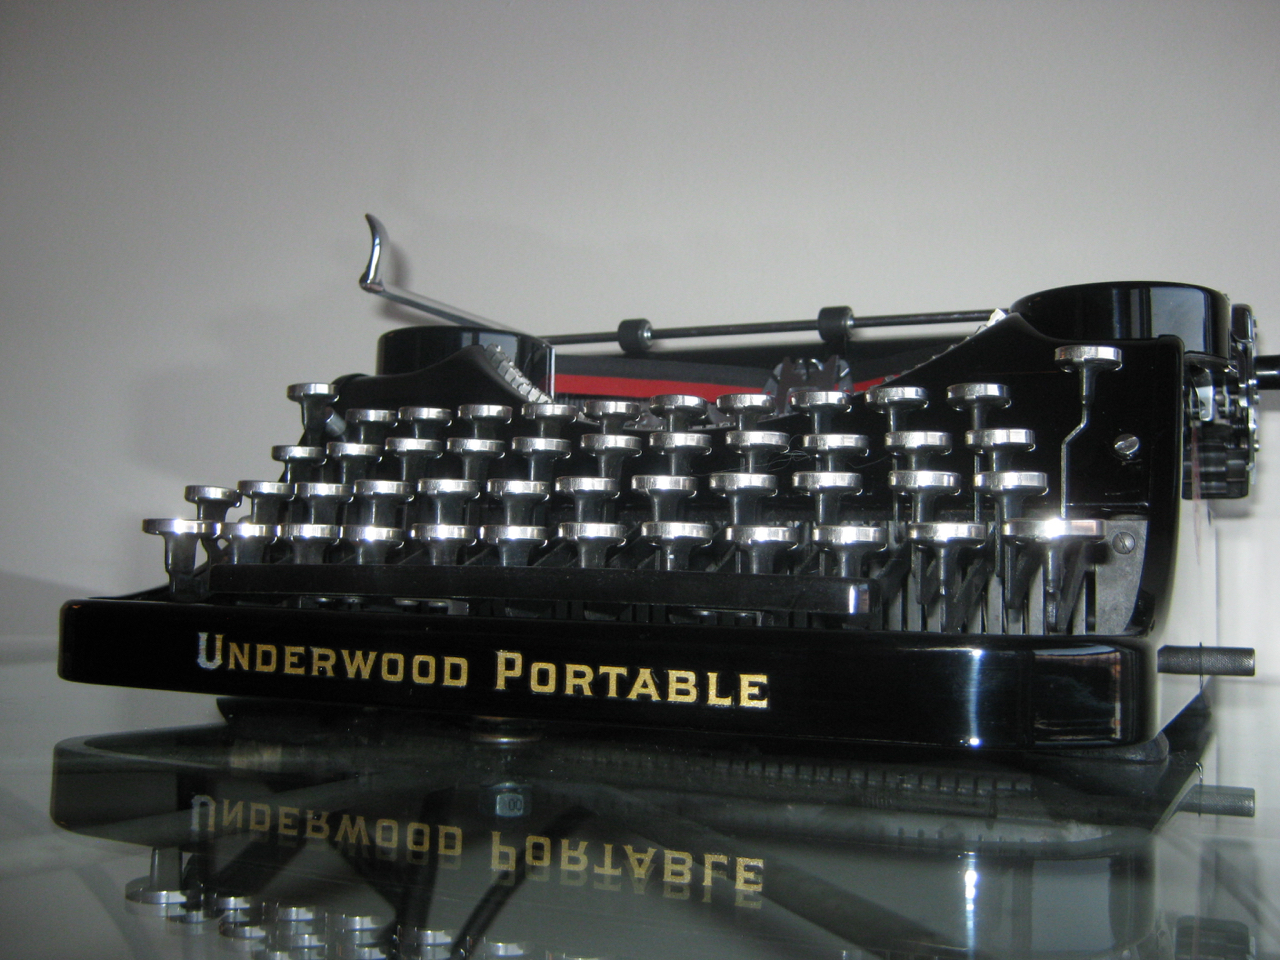
On a pleasant summer’s day in 2016, a Remington Standard 2 typewriter from 1886 was found amidst rubble, dirt, bird droppings and creaking ‘silence’ of a barn in southeastern Ontario, Canada. Restoring it would turn out to take a year…but holding something in my hands that once conveyed Victorian-era words of persons long since passed on, made me feel I was reverently shaking hands with history.
The sights, sounds, and smells (yes, smells) of the typewriter have always beckoned interest. Arguably, a writer’s first draft never flows better – a pleasant (re)discovery for many writers in the digital era. Yet, beyond even that, there is something further to the wide appeal of this great machine that calls to so many. I’ll leave discerning whatever that is to you.
I am not a believer in the casual DIY restoration for machines. I have done many restorations of typewriters, and I have always tried to use correct techniques advocated in the service manuals, and blueprints of those bygone eras, in tandem with approaches observed and discussed with research experts, and a (semi)retired typewriter repairman friend. Tackling the restoration of what otherwise might have been dismissed as a ruined metal hulk, is something I take seriously, and joyously. Sometimes, however, you just have to figure things out for yourself – and this 131 year old piece of industrial revolution machinery would prove to require some…well, frankly, ‘MacGyver-ing’ to restore.
The Process…
The first thing I usually do when restoring a typewriter is identify delicate, about-to-break or fall off parts, before proceeding with the coarse debris and dust removal. This of course is not a casual process, as I need be cautious to not dislodge loose parts, springs, or antique fasteners.
Once I have air dusted, I usually take a series of high-resolution photos of every conceivable angle outside in natural light. This particularly true if I am planning a disassembly in order to clean, repair, and (if necessary) replace broken parts. Typewriters are notoriously complex machines with many (many, many) intricate, unique and often minuscule, proprietary parts. So, it is an absolute certainty, that I will be referencing those same photos later in re-assembly. They are more often than not much-needed Godsends later on to effect a correct re-assembly.
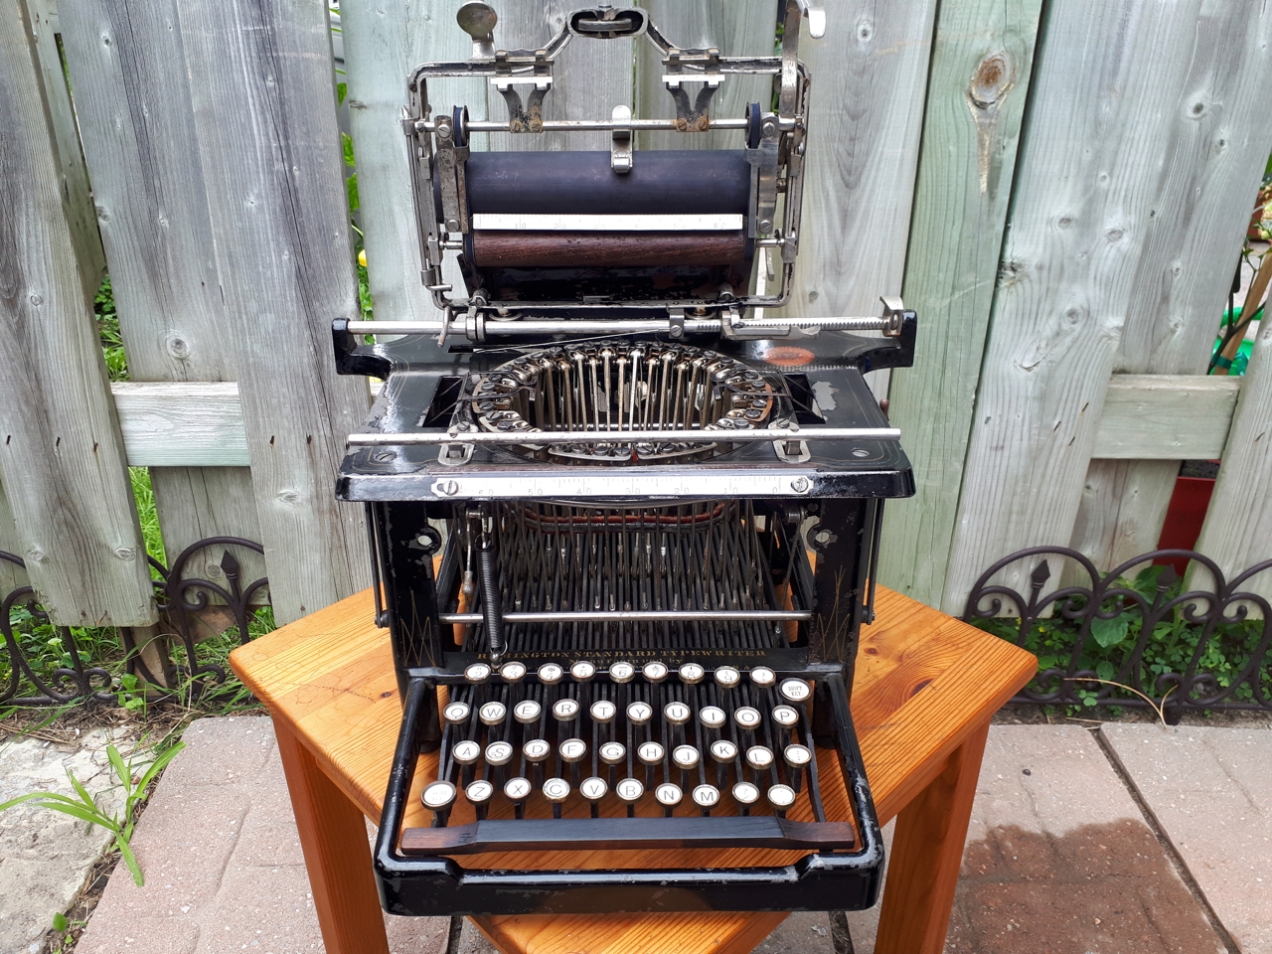
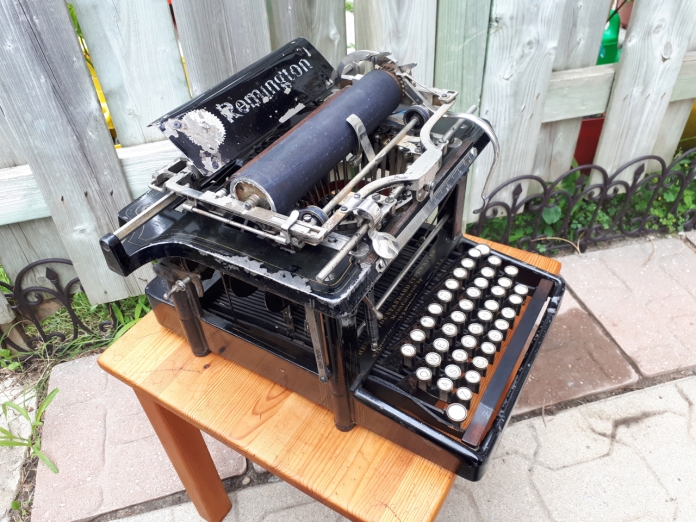
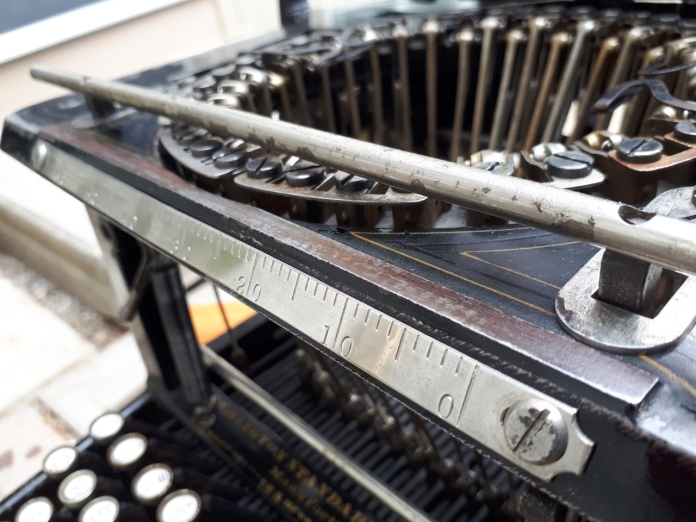
A disassembly is a decision rarely taken, and never one taken lightly. It is a restorer’s option of last resort, for it is usually unnecessary. It risks breakage and/or loss of parts. However, when the machine in question is in such bad shape due to seizing of moving parts along with overall rust damage (as was the case here), sometimes it seems little choice exists – and it ends up falling under the ‘what have I got to lose?’ category. Since in my initial diagnostic, I had little hope this nineteenth century relic would ever move again, the risk/reward made sense. So, in this case, a complete disassembly approach was undertaken to clean and safely remove the deeply embedded rust.
I slowly (and delicately) began the process and noted all the parts, and their position. Once surface rust and dirt had been removed with nylon brushes, I soaked all affected parts in an enzyme-based rust removal solution over several days. Such a solution is necessary to preserve what (if any) undamaged painted surface remains, while getting at as much of the underlying rust as possible. It is an expensive solution if one is to hope to soak such a large frame, so I had to do it in stages. Once completed, and rinsed, the parts are re-immersed in order to prevent flash rusting. This is not a permanent solution for the exposed metal, but it certainly buys enough time until later stages.
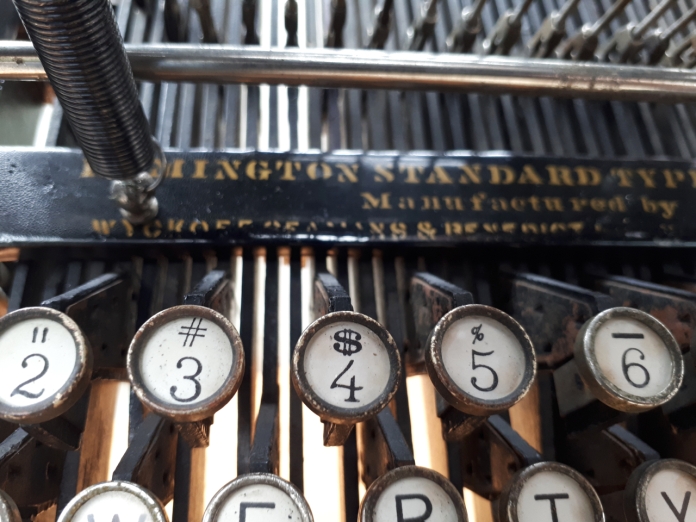
All moving parts were freed using the long-standing typewriter repairmen’s best friend: mineral spirits. A simple application using fine-haired artist brushes was usually sufficient. Once the solvent had done its job, the (much) later application of appropriate lubrication in (only) the appropriate areas could be done without worrying about compounding any problems, due to un-dealt with crud, old oils, nicotine, build-up, and residue(et al). All paint and metal flaking (of surface patina) was safely removed using a slow process of appropriate brushes, clay bar, high-grit wet sandpapering, and emery cloth, as appropriate to the surface in question. Restoring any of the remaining painted lettering or pin-striping was concurrently achieved. The decision to NOT remove all paint down to the metal, prime, and re-paint, followed by the application of replica decals and clear coat seal, was made in order to allow this 131 year old piece of history speak for itself, in its present restored state. This is simply because I was not keen on creating a replica of itself. Accordingly, I restored what I could of the remaining paint using the clay bar, sometimes 3000 grit wet sandpapering, compound, polish, and micro-crystalline wax sealing. The exposed metal would never be 100% protected, but the wax coating would provide a decent seal in a dry interior environment for some time.
![]()
Similarly, there had been a great loss of patina in a number of areas, and since I would not be pursuing re-nickelling of these parts, they were for the most part left alone. Some cursory polishing and sealing of the plating patina on associated un-painted metal parts (e.g. the carriage advance lever) was done, where possible.
Most of the effort in the restoration was on the mechanical side. The escapement mechanism and the nearby drumspring were heavily damaged. However, with time and patience the intense seizing of all moving parts was freed and they are living a second life once again, right down to the tiny spring that moves the loose dog mechanism. I was amazed that the original drumspring could be wound under its tension once more, and in lieu of the long since departed leather strap that pulled the carriage under said tension, I used an attractive looking fishing lure line made of high tension steel, protected in a clear plastic coating. Though it could be prone to slippage off the drum (were it to be used on a regular basis), it serves this purpose well and unobtrusively, since there are no plans beyond the occasional demonstration to actually type with it.
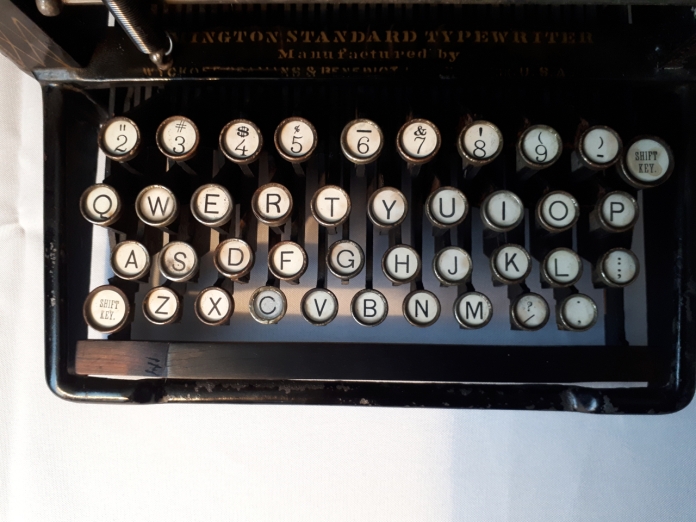
Finally, the case of the missing letter “C” keytop was resolved to my satisfaction, following the old adage – in the event you haven’t a replacement, make it yourself! Since, I had (thankfully) the original metal encasement for the glass top cover and letter underneath, what I needed was a letter “C” that resembled its companion keytops nearby. A high resolution photocopy of the letter “G”, altered with corrector tape to look every bit the letter “C”, was cold laminated and cut out. A hole saw drill bit, with the correct edge for glass cutting, was purchased in the correct size. Using a friend’s drill press, I cut out the required 2mm thick pane and glued the laminate to the underside, (ensuring no air bubbles were present). The original wooden typebar drive shaft for the letter “C” had largely rotted away at some point in the past, and so using the letter “V” shaft as a model, I had one made to size, and affixed the new letter “C” to it. Voila – a replacement keytop that resembled the original had been found, effectively filling the gaping hole its predecessor had left behind.
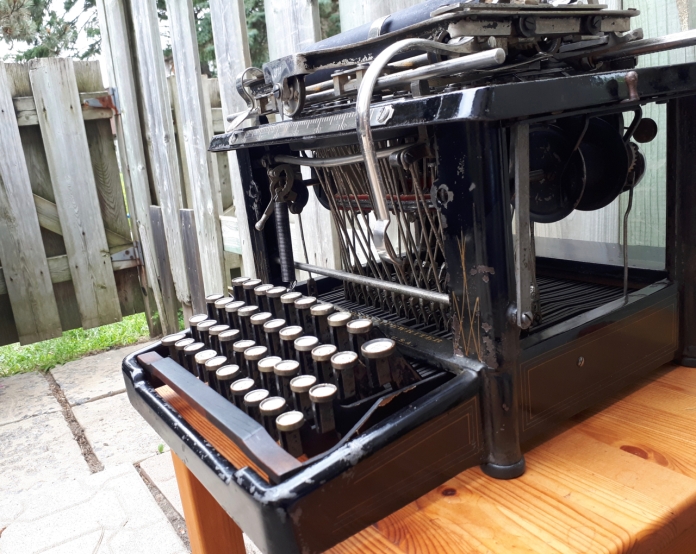
Re-assembly took some time, with most of the time being in the correct laying out of the typebar shafts in the spring board, followed by the complex task of re-affixing every typebar to the frame while suspended correctly over the basket. Incidentally the original felt bumper cleaned up beautifully and supported the type slugs well once more in their resting position. The rest – from the myriad screws and shoulder bolts to the carriage lever assembly to the bell hammer and bell assembly, went relatively smoothly, if slowly. If there is one thing a typewriter restoration will not allow for, it’s being rushed.

I had two final mechanical issues to attend to. At some point in the past, the letter “F” typebar’s welded clip had fallen from the type bar lever. Successfully brazing a new piece of metal onto the typebar would prove to be too complex for a moving object near its stress point, and what’s more would have involved risking damage to the 131 year old letter “F”‘s typebar and shaft – this was something I was unwilling to take a risk doing. I was able to fabricate a suitable solution using a safety pin’s metal shaft, reshaped by jewelry pliers and patience. It fit well, and the typing action for the “F” was alive and well. Lastly, the spacebar mechanism had a problem. It works by means of the drawing down of two hook-like shafts when the spacebar is depressed, causing movement of the rocker motion in the escapement assembly. These 2 hooks are screwed at their bottom-most point to the a wooden crossbar that underlies all of the typebar shafts. The spacebar, which is itself under spring tension nearby, moves this crossbar downward, thereby pulling the hooks. However, these hooks were on their last legs, having been almost entirely rusted away at the point at which they become threaded and enter into the wooden crossbar. Attempting to remove the old metal remnant of the shaft in the cross bar proved to be next to impossible without risking damage to the original wooden crossbar. Essentially, the only solution would be to drill a hole immediately adjacent, using a very small bit, and then to replace the hook with a comparable part. The best choice for something that could be shaped to resemble this hook was of all things…a coat hanger. I cut one to size, and matched its shape to the other (still existing) original hook, using jewelry pliers, once again. I choose to drill a bore shaft slightly smaller than the coat hanger shaft diameter and it held in place, requiring no threads (even when later tested as part of the spacebar mechanism’s movement of the rocker assembly). So, despite its having no threads, the minute shaft I drilled into the crossbar with my Dremel tool proved to do the trick in providing a sufficient grip on the new part. This would turn out to be a very satisfying fix, when I would later learn how successful it was in the upcoming testing phase.
Intriguingly, this early model Remington featured a wooden roller that was designed to be held in place against the rubber platen with elastic bands. Clearly the originals were long gone, so using a thick elastic cut to approximately 3mm in width, I slipped them into their original tracks, and guides. The metal of the guides and the screws that hold them in place had to be adjusted, but they worked fine in the end in properly holding a test piece of paper in place.
A note on the restoration of the beautiful hardwoods of the spacebar and roller. It had been thoroughly blackened over time with use, finger oils and all manner of build up, which 131 years will yield. After cleaning it with some Murphy’s Oil soap, I used furniture restoration product followed by a beeswax finish (both by Howard’s), to bring about the absolutely beautiful final results – this brought the original reddish-brown gorgeous tone to the aged hardwood (which seems to be mahogany or perhaps cherrywood) . One could see on completion how the Remington Standard 2 was a glorious and esteemed product in its time, for either a company or individual to own. It featured excellence in engineering ingenuity, and the aesthetic beauty of the Victorian era.
The only things I did not do was install a ribbon nor perform a calibration on the typebar alignment. The principle reasons for these had to do with the fact that: a) it was not going to be used for actual typing (though it certainly was now ready to be); and b) that it would ultimately be too fragile with age and metal fatigue to endure much in the way of on-going usage, and so beyond showing it off as a conversation piece at parties, I didn’t wish to encourage the temptation to do so. Calibration of the type alignment would take considerable time, and risk further fatiguing the machine through the trial and error it would no doubt have required in order to achieve success. This would not have been your standard type alignment, which the tool depicted in the old 1885 Scientific American article would attest to – and which I did not possess. I could have replicated the approach, but I was ready to leave well-enough alone on this fine antique machine at this point, and move on.

All that remained was a final wiping, and buffing, and then I would be ready for the final testing phase. I did so, and enjoyed watching it perform all of its original functions correctly. It was rickety, but less so than I expected. With a simple lubrication (using the correct sort of lubricants in only the correct places), the carriage moved steadily down the plated rails.
Once again, the bold sounds of the heavy hammer on its 19th century bell would confidently ring forth in any room it might grace from that day forward…bringing a smile onto the face of all who ever hear it.

Congratulations! Great work Adam! That is one fine, splendid, beautiful typewriter!
Thank you, Bill! It was an incredible journey, but well worth it! Cheers 🙂
Well my friend, you surpass yourself an incredible job and one I would never have considered even if such a machine was ever present in the U.K. You are a credit to our world of mechanical marvels. I stand in awe.
As always my kind regards…..Barry
Barry – I am humbled by your words, and coming from you whom I hold in high regard, I don’t know what to say, so I’ll simply say thank you!
-Adam
I am impressed by the thought and care that went into this restoration. Well done! Thank you for sharing.
Thank you Richard! That is very much appreciated. It was indeed laborious but certainly worth the effort it took. I was glad to be a part of such a project. Thanks again for your feedback,
Adam
I bought a Remington identical to this in 1947 at a used furniture store in Ventura CA. It was in surprisingly good condition, considering Ventura is on the coast and gets a lot of fog and this was in a shed. Maybe it hadn’t been there long. I don’t remember that big spring that comes down just behind the 2 key. Nor do I remember it not having a left platen knob. I do remember that big lever coming down to lift the carriage so you could see what had been typed. It also served as the carriage return lever. And what impressed me most as a 15 year old was all the wooden type levers. It did have a rather wide ribbon as I recall. And it had no model number, so I always thought it was a #1, until Richard Polt corrected me.
My folks built a house in the country while I was in the army in 1954, and they put my typewriter collection in a cupboard in the garage. Unfortunately, the field mice found the typewriters to be a nice place to build a nest. In addition to the Remington, I had a Smith Premier, an Oliver #2 or #3, I don’t remember, and a folding Smith Corona #3, which survived as it was safe in it’s case. When we sold the house, we donated the typewriters to a local museum. About 5 years ago I sent them an email asking if they still had them, but got no reply. I sure wish I had taken pictures of them in their prime, as they were all in good shape.